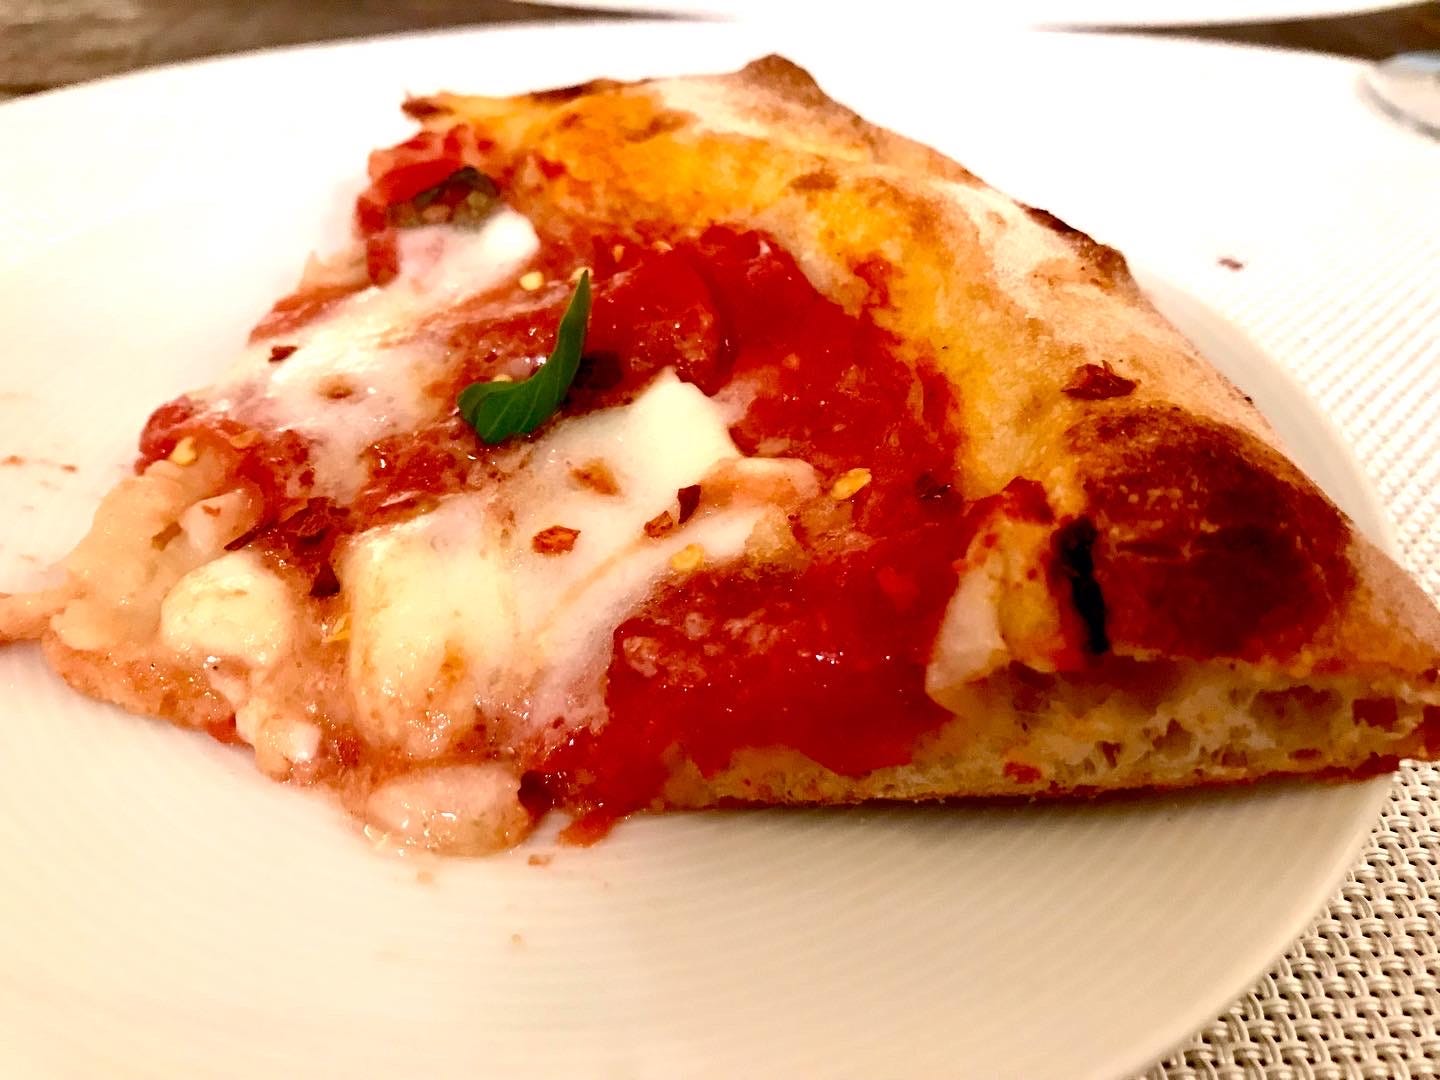
Friends requested pizza for the weekend football games. “Try this,” said one, sending me a recipe for a technique I didn’t know. You can see it here. I will never again make pizza any other way. What techniques have changed your life?
The most current thing that has transformed my cooking -- but especially my baking -- is to weigh everything! And now I do it in metric. As a baker, I really value a recipe that contains weights instead of just volume. And learning "bakers percentage" has really changed my bread game. As I was watching the video, I was mentally calculating the hydration percentage of his finished dough and mentally scaling it down to something less than 10 pizza balls. Ruth, I have a few food heros throughout my life, but you were and are one of the first and the best. Really can't express how happy I am that you are giving us La Briffe
If you mean a cooking/baking technique that was transformative....
1. Parchment paper. I guess that's a product, not a technique, but what a difference it makes!
2. Several years ago, a friend taught me how to can. The idea that in the dead of winter I can reach into the hall closet for a pint of tomatoes still brings me such joy. (Maybe I need to get out more?)
3. I'm also sinfully happy each time I make an all-butter pie crust. That moment when a lump of flour, fat, and water becomes a pastry sheet is still magic to me.
4. Ditto homemade pasta. What is it about those flour sheets?
5. Roasted vegetables. Maybe I was a little sheltered in the past. It feels new to me!
Learning how to make Julia Child's version of baguette changed my culinary life. I watched the hilarious YouTube video of her spraying the baguettes with water in the oven as they baked and I tried it. The bread was delicious and had an incredible crust and texture. I also used artisanal unbleached bread flour that gave the loaves a brown colour, even though they were not whole wheat. I used the Joy of Cooking recipe called "Rustic French Bread" but augmented the technique to reflect Julia's method. It is the most delicious bread I have ever made.
The technique of "stretch-and-fold" has transformed my bread baking. I don't use those "no knead" recipes. Instead I start the kneading process (with a dough hook in an electric stand mixer) for a few minutes, then let the dough rest for 30 minutes before starting the stretch-and-fold process. I like the way I've learned to handle the dough with wet hands -while it's still in a large bowl- instead of the classic technique of kneading dough on a floured board or countertop. The "stretch-and-fold" technique allows you to work with a wetter dough, while developing the gluten and strengthening the dough, resulting in better flavor and lighter texture of the bread.
Moreover, there's something enjoyable about handling the soft dough with wet hands - it's sensual!
I've made pizza probably 48 Saturday nights a year for more than 50 years, not counting the times in junior high when I made pizzas from the box of Chef Boyardee mix. The recipes in heavy rotation are Roberta's from cooking.nytimes; Detroit-Style from Kenji Lopez-Alt at seriouseats; pour-in-the-pan pizza from Christopher Kimball at Milk Street; Chicago-style from Jeff Smith, the Frugal Gourmet, at https://www.pizzamaking.com/deepdish.php; and the personal Pizza Hut-style pan pizza from cooking.nytimes. I've made BBQ chicken pizzas, french bread pizzas, Mexican pizzas, calzones, stromboli, cornmeal crusts, and my grandson Ethan's favorite cheeseburger pizza from the Food Network. (It tastes exactly like a typical fast-food cheeseburger.)
Even with all this experience, I'm still learning new things. Several months ago, I learned about the gum line, the undercooked dough between the bottom crust and the sauce. Today, I learned from the video link a terrific way to stretch a ball of dough, and also that "This is not dough. This is air."
Not so much a technique but an ingredient: an anchovy, a dab of crushed sun dried tomatoes or a smidge of miso paste to improve sauces and stews and add that indefinable satisfyingness. It just adds that flavour and depth. So I guess you could say a technique to add flavour and depth.
I don't suppose I'm the only one who finds that when you have to sear chunks of chicken breast and thigh for Tarragon Chicken in melted butter, after not too many pieces, the whey in the butter turns brown and leaves black speckles on the chicken which transfer into what should be a clean finished cream. So when I had to make it for 45, I invented this technique: Instead of searing your chicken chunks in melted butter, put the chicken into a big bowl, melt the quantity of butter and pour it over the chicken. Quickly and thoroughly toss the chicken in it with clean hands. Then sear the pieces in as many batches as it takes in a hot dry pan. If black specks begin to appear, wipe the pan with a paper towel then carry on. Result: not just clean cream but a job done in half the usual time.
A houseguest showed me how to get the seeds out of a pomegranate by cutting it in half along the equator, turning it on its side over a bowl, and whacking it hard along the outer perimeter, then on the bottom, with a heavy spoon. The seeds fall directly into the bowl and the whole enterprise is done in less than a minute. Now during pomegranate season I have one for breakfast almost every morning instead of buying them and watching them slowly die in the refrigerator.
Cooking: proper salting. This includes salting meats hours or even days before cooking and salting vegetables properly before cooking or while cooking (ie. proper salting cooking water etc…) Baking: 2 stage cake mixing method.
Unlike the creaming method that yields a light, strong cake, the two-stage method yields a tender cake with a velvety crumb. First you combine all of your dry ingredients, including the sugar. You mix the eggs with the flavorings and 1/4 of the liquid. You then cream your softened fat and the egg/milk mixture into the dry mixture, and mix to moisten. Then, you mix for about 1 to 2 minutes to develop the cakes structure and aerate the batter. Then you add the remaining liquid in 2 additions, mixing just a few seconds after each addition to blend. It’s the preferred method of Rose Levy Beranbaum. Side note. Me and my husband love you. We remember the days when your were Food Editor at the LA Times. The Yellow Gourmet Cookbook. We love the blog. If you see Hal Rubinstein tell him Seth Savarick said hi.
Baking bacon in the oven changed my life. As a kid I was always getting burned by the sizzling when my mom cooked it in in frying pan on the stove. So much less maintenance and clean up too.
i think i was 12 years old when i read a recipe that said something like... combine with a fork DO NOT stir with a spoon. so; i did two batches (it was some sort of cake). the forked one was heads above the stirred. from that i learned to respect such details in recipes; universally!
Love this pizza dough recipe!! I need a stone. I was working at the Hilton in Long Beach. The cleaning crew cleaned the pizza oven and put water on the stone when it was still hot and it broke. There was a piece that was a perfect size to fit in my oven. I used it all the time. It didn't come with us when we moved. The technique that changed my life I guess was how to turn an old refrigerator into a curing chamber. I now cure my own charcuterie and make my own cheese. I ordered some blue cheese mold (candidium roqueforti) and I'm going to make blue cheese for the first time. Wish me luck........
Thanks Ruth. What "worries" me the most is some of the pictures I've seen of homemade blue cheeses. I imagine they taste great but they sure look scary. LOL I'll send pictures of the process and finished product.
I've seen some old-style, authentic "blue cheese" (actually the mold is green, not blue!) imported from France at Trader Joe's. I've bought it, eaten it, and found it wonderfully rich, even decadent. It may look weird (at least compared to more conventional American blue cheeses) but it's spectacularly delicious. It's made from raw sheep's milk and probably the same mold you ordered. I don't have any here at the moment or I'd check to see what it is (the name of the mold used is listed on the packaging.) If I remember correctly, TJ's sells it for $11.99 per pound these days.
It's soft, luscious, even slightly gooey, but it's also very salty. Personally I don't mind the saltiness, but it does require one that one consume it in relatively small quantities. At least that's true for me.
I love making pizza at home and learning new techniques! Our family favorite is Kenji Lopez-Alt Sicilian Pizza. I have it made more than other pizza recipe. I even had 25 college students at my house lat week and taught them how to make it. The technique for layering mozzarella cheese slices between the dough and sauce is a game changer!! I am not a fan of red sauce that comes with the recipe - but that dough and that cheese technique - there are no words!
An artichoke heart pizza from LoCoco's on Piedmont Ave in Oakland totally re-opened my eyes to good pizza. And slightly before the LoCoco's pizza, the Chez Panisse Cafe pizzas which Michele, their first piazzola in the Cafe, made on a daily basis really impressed me: thin crust, beautifully charred with the lightest blessing of a sauce and wonderful sausage. Oh how good! And that was the new standard of pizza for me. Wolfgang Puck refined the model even more with his smoked salmon pizza, served lovingly under his gaze, at Spago on our 5th wedding anniversary in 1991 - now that was some pizza!
Thanks for that. I have such fond memories of Michele - that great smile of his! And I have a picture of him teaching my son to toss pizza about 25 years ago.
Over the years, I've cultivated techniques for stealth fat reduction that don't greatly compromise flavor. Most meatball recipes, for instance, call for browning them in oil before putting them into a sauce. A quicker method that doesn't use oil and also renders some of the meat fat is to brown them briefly on a parchment-lined sheet pan in a hot oven and then to put them into the sauce. I do something similar with eggplant and potato slices for casseroles, lightly oiling them instead of saturating them as frying does.
Learning to make my chef instructors crepe...omellette..french sauces at Cordon Bleu Paris w my then 18 year old grandson..4 days of french sauces then eating them w accompaning wines. Best idea ever. Did Airbnb to pay for $1k each trip...GENIUS!!
With out the poolish, pizza dough is just baked bread ;) Tony Gemignani's "The Pizza Bible" (Ten Speed, 2014) has our go-to recipe. Extraordinary fragrant and fermented aroma, better pizza than most "pizza restaurants" which can't be bothered with an overnight ferment.
Late to the party as usual. Adding a 'flavor bomb' at the end of cooking soups/stews. In particular bean/legume soup. Strongly flavored herbs-cilantro, chervil, rosemary etc-with some wine vinegar/citrus juice/wine, fresh garlic paste, aioli etc can add a whole simple fresh layer of flavor. Let them float on the top, they will get stirred in naturally. Just a few tablespoons, not a lot. Nuanced.
I will be 69 next week. I am a self taught baker and cook, Italian by ancestry. I am constantly learning and observing new techniques to put them in my recipes. I have over 800 recipes in my repertoire that are my own. I watch recipe video's, research each recipe I am interested in learning about on the internet and in my collection of cookbooks (not all recipes are on the internet, especially old classics). I experiment with flubs and fabulous results. I sometimes ignore baking rules and experiment with new techniques that really work. Who said rules are set in stone? My love of entering recipe contests has welcomed many wins and new recipes that I cherish. The best baking technique I have taught myself is creaming VS high ratio mixing methods. My Italian Lemon Amaretto Pound Cake (Bundt) won first prize in 1991 using the creaming method. I updated the technique for this recipe to the high ratio (paste) mixing method and won another contest just a few years ago. The crumb is fine and perfect and the batter never separates while you are mixing. Never let rules keep you from experimenting.
I work in a cheese shop and many of us make pizza regularly. A customer shared her recipe with me and I love it! OO flour, water, yeast, & EVOO. The technique involves letting the dough rise for about 20 mins then freezing it overnight. I put it in the fridge on pizza morning and put it on the counter for a few hours that afternoon. Absolutely the most reliable dough I've ever worked with; it's a crowd pleaser for sure.
I've been using the recipe from the link below which results in a crunchy, toothy pizza crust which must be similar to the recipe you've linked here. It also employs a bulk ferment so you have to plan ahead, but it's so worth it! https://bakingthegoods.com/2017/04/11/72-hour-pizza-dough-from-baking-steel/
I'm sorry but I could not sit through that video. I wish there was a written recipe but it seems simple enough. You make a poolish with 00 flour, let it ferment overnight and then a few hours before you want pizza you complete the dough with more flour and salt and maybe some olive oil, let proof once and then make your pizza. I assume you heat the stone in a 500 degree oven for an hour (I always also turn the broiler on for 10 minutes before I put the pizza in) and then bake the pizza at 475-500 for 6-12 minutes.
I know, the video is way too long. But it's useful for demonstrating the techniques. If you want a sloppy written version of the video, here it is:
Pizza Recipe
Poolish
150 mililiters water
150 grams flour
2 ½ grams yeast
Bit of honey
Stir together. Let sit at room temperature one hour. Put in refrigerator for about 24 hours.
Pizza
350 milliliters water
20 grams salt
625 grams flour
Stir the poolish into the water. Add half of the flour and stir well. Add the salt and the rest of the flour and mix well. Turn it out onto the counter and work the dough, pressing and pulling until smooth. Let it rest 15 minutes.
Put olive oil on your hands, pick up the dough and pull it over and over, making a kind of ballon, unti it is smooth. Oil a bowl and put the dough ball into the bowl, cover and allow to sit at room temperature for 30 minutes.
Turn the dough onto a board, put a bit of olive oil on your hands and divide the dough into 5 balls.
Sprinkle a baking pan with semolina and place the balls into the pan. Pat a bit of oil on top of each ball and wrap the pan in plastic wrap. Allow to rest for 2 hours at room temperature.
Place a pizza steel into the oven and preheat the oven at 500 degrees for 1 hour.
Stretch a ball of dough into an 8 or 10 inch round. Cover with simple tomato sauce. Put in oven until crust is golden. Remove, dust with grated parmesan and chunks of mozzarella and put back into the oven until fully cooked.
I tried this pizza technique. I ended up buying a cast iron pizza pan (instead of a steel or stone) because pizza is now the favorite meal of the family.
mirepoix... once I learned the value of a good mirepoix, there was no turning back. I don't make soup or sauce without starting with a mirepoix. such an easy process, but such deep flavors that come from it.
1). The Pasta Maker, finally. I have always been successful at creating pasta like gnocchi by hand. However, I have never been successful at rolling out pasta dough when it needs to be thin. Problem solved.
2). Semolina Flour. The flavor. The bite. The ease of use for hand shaped and specialty pastas. Yes, Semolina has changed mine and my husband's life.....I know it's heresy, but I was "forced" to use Semolina for Pierogi, for lack of AP. Sorry, but it took that Pierogi to the next level.
3). 00 Flour. Easier to work with. Better texture and crunch with all things crust and bread. I tried it to dredge chik breasts for pan sautee. The crunch was as close to fried chicken as could be without all the fat. Who knew?
I can't wait to try this! I fell in love with a simple cast iron skillet using Pastene tomatoes as sauce. It allows for some fermentation time and I've made it in the same day or several days later. Big fun. And, brilliant.
Chunky mashed potatoes, best if made without peeling (but washed) thin-skinned potatoes. The result is very similar to a scone, whereas one mixes the dough enough to create a melange but not so much that it is smooth. The uneven air pockets and dough balls add integrity to the scones. As for potatoes, lots of butter but very little mashing makes for a chunky side dish that's quick and easy to make.
Understanding that you need one of two things to make gluten in a dough: kneading or time. And then experiencing the joy of making Bon Appetit's 'Shockingly Easy No-Knead Focaccia' for toast soldiers, panini, and Detroit-style pizza that will knock your socks off.
Is anyone else amused at how he describes this as a fast and easy method for pizza in a few hours and same day? Hardly same day, hardly simple. But his end product certainly looks superior. Also he doesn’t explain why the dough must remain right side up throughout the process. Something to do with air bubbles maybe?? Would love to know.
I think he is trying to maintain the gluten veil that forms with well handled dough. Have you ever microwaved something covered with plastic and it forms a high bubble because you didn't poke holes in it? Same thing with a carefully formed gluten veil. It has strength from the gluten that allows the gases to expand the dough but not blow through it, thus giving a beautifully bubbly crust. Sometimes bread bakers want to control and open up that veil by slashing their proofed loaves with a lame, knife or razor blade, allowing gases to expand while making beautifully shaped bread
Naan bread. I would find Naan bread on clearance at my local grocery often. I decided to try making pizzas with the Naan. They are incredible. You need to EVOO your bread on both sides and place on cookie sheet and put in 425° oven for about 8 minutes. Pull out and flip bread over. This creates a crunchy crust under the sauce. Add all of your favorite pizza ingredients, sauce (traditional, cheese or Alfredo), pepperoni, mushrooms, bell peppers, black olives, banana peppers, jalapeno peppers, rotisserie chicken, cheese, etc. Bake for 8 - 10 minutes and golden. This recipe sounds delicious as well. I pinned it into 'my recipes to try'.


The most current thing that has transformed my cooking -- but especially my baking -- is to weigh everything! And now I do it in metric. As a baker, I really value a recipe that contains weights instead of just volume. And learning "bakers percentage" has really changed my bread game. As I was watching the video, I was mentally calculating the hydration percentage of his finished dough and mentally scaling it down to something less than 10 pizza balls. Ruth, I have a few food heros throughout my life, but you were and are one of the first and the best. Really can't express how happy I am that you are giving us La Briffe
If you mean a cooking/baking technique that was transformative....
1. Parchment paper. I guess that's a product, not a technique, but what a difference it makes!
2. Several years ago, a friend taught me how to can. The idea that in the dead of winter I can reach into the hall closet for a pint of tomatoes still brings me such joy. (Maybe I need to get out more?)
3. I'm also sinfully happy each time I make an all-butter pie crust. That moment when a lump of flour, fat, and water becomes a pastry sheet is still magic to me.
4. Ditto homemade pasta. What is it about those flour sheets?
5. Roasted vegetables. Maybe I was a little sheltered in the past. It feels new to me!
My sister from a different Mister!!! I totally agree with this list :)
For sure
Learning how to make Julia Child's version of baguette changed my culinary life. I watched the hilarious YouTube video of her spraying the baguettes with water in the oven as they baked and I tried it. The bread was delicious and had an incredible crust and texture. I also used artisanal unbleached bread flour that gave the loaves a brown colour, even though they were not whole wheat. I used the Joy of Cooking recipe called "Rustic French Bread" but augmented the technique to reflect Julia's method. It is the most delicious bread I have ever made.
The technique of "stretch-and-fold" has transformed my bread baking. I don't use those "no knead" recipes. Instead I start the kneading process (with a dough hook in an electric stand mixer) for a few minutes, then let the dough rest for 30 minutes before starting the stretch-and-fold process. I like the way I've learned to handle the dough with wet hands -while it's still in a large bowl- instead of the classic technique of kneading dough on a floured board or countertop. The "stretch-and-fold" technique allows you to work with a wetter dough, while developing the gluten and strengthening the dough, resulting in better flavor and lighter texture of the bread.
Moreover, there's something enjoyable about handling the soft dough with wet hands - it's sensual!
Wow!! Mind-blowing!!
I've made pizza probably 48 Saturday nights a year for more than 50 years, not counting the times in junior high when I made pizzas from the box of Chef Boyardee mix. The recipes in heavy rotation are Roberta's from cooking.nytimes; Detroit-Style from Kenji Lopez-Alt at seriouseats; pour-in-the-pan pizza from Christopher Kimball at Milk Street; Chicago-style from Jeff Smith, the Frugal Gourmet, at https://www.pizzamaking.com/deepdish.php; and the personal Pizza Hut-style pan pizza from cooking.nytimes. I've made BBQ chicken pizzas, french bread pizzas, Mexican pizzas, calzones, stromboli, cornmeal crusts, and my grandson Ethan's favorite cheeseburger pizza from the Food Network. (It tastes exactly like a typical fast-food cheeseburger.)
Even with all this experience, I'm still learning new things. Several months ago, I learned about the gum line, the undercooked dough between the bottom crust and the sauce. Today, I learned from the video link a terrific way to stretch a ball of dough, and also that "This is not dough. This is air."
Amazing. Thank you for passing along this lesson.
my brother and i used to make those Chef Boyardee pizzas out of that yellow box on Saturday nights... to have while watching Twilight Zone..
A yes i remember it well
Not so much a technique but an ingredient: an anchovy, a dab of crushed sun dried tomatoes or a smidge of miso paste to improve sauces and stews and add that indefinable satisfyingness. It just adds that flavour and depth. So I guess you could say a technique to add flavour and depth.
Wow..inspiring
Feel priviliged to have found this!!
I don't suppose I'm the only one who finds that when you have to sear chunks of chicken breast and thigh for Tarragon Chicken in melted butter, after not too many pieces, the whey in the butter turns brown and leaves black speckles on the chicken which transfer into what should be a clean finished cream. So when I had to make it for 45, I invented this technique: Instead of searing your chicken chunks in melted butter, put the chicken into a big bowl, melt the quantity of butter and pour it over the chicken. Quickly and thoroughly toss the chicken in it with clean hands. Then sear the pieces in as many batches as it takes in a hot dry pan. If black specks begin to appear, wipe the pan with a paper towel then carry on. Result: not just clean cream but a job done in half the usual time.
Brilliant! thanks.
Also works to use ghee!
I use ghee for all pan browning or sautéing in butter but your technique will definitely work in a pinch!
This is brilliant. I have a roccbox, but I’ll still follow this technique. Thank you so much Ruth. I really have been enjoying your posts.
One thing I often do is I strain my pasta water over greens (spinach, kale, chard) then add it to my serving of whatever I’ve cooked. Simple.
A houseguest showed me how to get the seeds out of a pomegranate by cutting it in half along the equator, turning it on its side over a bowl, and whacking it hard along the outer perimeter, then on the bottom, with a heavy spoon. The seeds fall directly into the bowl and the whole enterprise is done in less than a minute. Now during pomegranate season I have one for breakfast almost every morning instead of buying them and watching them slowly die in the refrigerator.
Use half as much poolish and add 200g of sourdough levan; let it ferment another 24 hrs!
Dry brining! Such a game changer. My husband's family thinks I'm a Turkey Whisperer...and I'm never going to tell them how easy it is....
Totally agree. When I first saw it I thought, why didn't I think of that?
Last Thanksgiving I dry brined and had the butcher cut the Turkey into pieces before roasting thanks to LA Times recipe. It was amazing
2 things: pounding garlic and salt together for sauces and salad dressings and also sheet pan cooking.
I am still using Wolfgang Puck's original recipe from Spago.
Parchment paper for sure, and a food scale - both have improved the reliability of my baking
Cooking: proper salting. This includes salting meats hours or even days before cooking and salting vegetables properly before cooking or while cooking (ie. proper salting cooking water etc…) Baking: 2 stage cake mixing method.
What is the 2 stage cake mixing method?
Unlike the creaming method that yields a light, strong cake, the two-stage method yields a tender cake with a velvety crumb. First you combine all of your dry ingredients, including the sugar. You mix the eggs with the flavorings and 1/4 of the liquid. You then cream your softened fat and the egg/milk mixture into the dry mixture, and mix to moisten. Then, you mix for about 1 to 2 minutes to develop the cakes structure and aerate the batter. Then you add the remaining liquid in 2 additions, mixing just a few seconds after each addition to blend. It’s the preferred method of Rose Levy Beranbaum. Side note. Me and my husband love you. We remember the days when your were Food Editor at the LA Times. The Yellow Gourmet Cookbook. We love the blog. If you see Hal Rubinstein tell him Seth Savarick said hi.
Next cake I bake I'm trying this. Thanks!
Baking bacon in the oven changed my life. As a kid I was always getting burned by the sizzling when my mom cooked it in in frying pan on the stove. So much less maintenance and clean up too.
On parchment is the best.
I’ll try that. Thank you!
The bacon cooks more evenly, too.
Judy Rogers' pre-salting technique for various proteins, as she describes in the Zuni Cafe Cookbook. What a revelation.
I’ve been salting poultry the Judy Rodgers’ way for years. Turkey, 3 days in advance. Chicken 1 day ahead. Epic and game-changer.
i think i was 12 years old when i read a recipe that said something like... combine with a fork DO NOT stir with a spoon. so; i did two batches (it was some sort of cake). the forked one was heads above the stirred. from that i learned to respect such details in recipes; universally!
Ruth~ Did you include a recipe for the pizza? I can't seem to access it.
The pizza recipe is embedded in the youtube link she provided.
Thanks!
Love this pizza dough recipe!! I need a stone. I was working at the Hilton in Long Beach. The cleaning crew cleaned the pizza oven and put water on the stone when it was still hot and it broke. There was a piece that was a perfect size to fit in my oven. I used it all the time. It didn't come with us when we moved. The technique that changed my life I guess was how to turn an old refrigerator into a curing chamber. I now cure my own charcuterie and make my own cheese. I ordered some blue cheese mold (candidium roqueforti) and I'm going to make blue cheese for the first time. Wish me luck........
I DO wish you luck. Please let us know how it turns out!
Thanks Ruth. What "worries" me the most is some of the pictures I've seen of homemade blue cheeses. I imagine they taste great but they sure look scary. LOL I'll send pictures of the process and finished product.
good luck!
Thank you. Cooking is all about experimenting and I'm all about replicating a known and safe process.
I bet it'll be fabulous.
I've seen some old-style, authentic "blue cheese" (actually the mold is green, not blue!) imported from France at Trader Joe's. I've bought it, eaten it, and found it wonderfully rich, even decadent. It may look weird (at least compared to more conventional American blue cheeses) but it's spectacularly delicious. It's made from raw sheep's milk and probably the same mold you ordered. I don't have any here at the moment or I'd check to see what it is (the name of the mold used is listed on the packaging.) If I remember correctly, TJ's sells it for $11.99 per pound these days.
It's soft, luscious, even slightly gooey, but it's also very salty. Personally I don't mind the saltiness, but it does require one that one consume it in relatively small quantities. At least that's true for me.
Oh I'm well aware of the green mold cheese. I'm talking about pictures of homemade blue cheese that is not only green but furry. LOL
Oh. Yikes. I'd be wary of that. More than wary. I'd avoid it entirely.
Do let us know how your project turns out!
It doesn't worry me. I cure my own meat and you should see the mold I've cleaned off of those. LOL
I love making pizza at home and learning new techniques! Our family favorite is Kenji Lopez-Alt Sicilian Pizza. I have it made more than other pizza recipe. I even had 25 college students at my house lat week and taught them how to make it. The technique for layering mozzarella cheese slices between the dough and sauce is a game changer!! I am not a fan of red sauce that comes with the recipe - but that dough and that cheese technique - there are no words!
An artichoke heart pizza from LoCoco's on Piedmont Ave in Oakland totally re-opened my eyes to good pizza. And slightly before the LoCoco's pizza, the Chez Panisse Cafe pizzas which Michele, their first piazzola in the Cafe, made on a daily basis really impressed me: thin crust, beautifully charred with the lightest blessing of a sauce and wonderful sausage. Oh how good! And that was the new standard of pizza for me. Wolfgang Puck refined the model even more with his smoked salmon pizza, served lovingly under his gaze, at Spago on our 5th wedding anniversary in 1991 - now that was some pizza!
Thanks for that. I have such fond memories of Michele - that great smile of his! And I have a picture of him teaching my son to toss pizza about 25 years ago.
Over the years, I've cultivated techniques for stealth fat reduction that don't greatly compromise flavor. Most meatball recipes, for instance, call for browning them in oil before putting them into a sauce. A quicker method that doesn't use oil and also renders some of the meat fat is to brown them briefly on a parchment-lined sheet pan in a hot oven and then to put them into the sauce. I do something similar with eggplant and potato slices for casseroles, lightly oiling them instead of saturating them as frying does.
Learning to make my chef instructors crepe...omellette..french sauces at Cordon Bleu Paris w my then 18 year old grandson..4 days of french sauces then eating them w accompaning wines. Best idea ever. Did Airbnb to pay for $1k each trip...GENIUS!!
With out the poolish, pizza dough is just baked bread ;) Tony Gemignani's "The Pizza Bible" (Ten Speed, 2014) has our go-to recipe. Extraordinary fragrant and fermented aroma, better pizza than most "pizza restaurants" which can't be bothered with an overnight ferment.
Love Tony’s recipe. Bought the pizza steel after attending one of his classes.
Late to the party as usual. Adding a 'flavor bomb' at the end of cooking soups/stews. In particular bean/legume soup. Strongly flavored herbs-cilantro, chervil, rosemary etc-with some wine vinegar/citrus juice/wine, fresh garlic paste, aioli etc can add a whole simple fresh layer of flavor. Let them float on the top, they will get stirred in naturally. Just a few tablespoons, not a lot. Nuanced.
I will be 69 next week. I am a self taught baker and cook, Italian by ancestry. I am constantly learning and observing new techniques to put them in my recipes. I have over 800 recipes in my repertoire that are my own. I watch recipe video's, research each recipe I am interested in learning about on the internet and in my collection of cookbooks (not all recipes are on the internet, especially old classics). I experiment with flubs and fabulous results. I sometimes ignore baking rules and experiment with new techniques that really work. Who said rules are set in stone? My love of entering recipe contests has welcomed many wins and new recipes that I cherish. The best baking technique I have taught myself is creaming VS high ratio mixing methods. My Italian Lemon Amaretto Pound Cake (Bundt) won first prize in 1991 using the creaming method. I updated the technique for this recipe to the high ratio (paste) mixing method and won another contest just a few years ago. The crumb is fine and perfect and the batter never separates while you are mixing. Never let rules keep you from experimenting.
I work in a cheese shop and many of us make pizza regularly. A customer shared her recipe with me and I love it! OO flour, water, yeast, & EVOO. The technique involves letting the dough rise for about 20 mins then freezing it overnight. I put it in the fridge on pizza morning and put it on the counter for a few hours that afternoon. Absolutely the most reliable dough I've ever worked with; it's a crowd pleaser for sure.
I've been using the recipe from the link below which results in a crunchy, toothy pizza crust which must be similar to the recipe you've linked here. It also employs a bulk ferment so you have to plan ahead, but it's so worth it! https://bakingthegoods.com/2017/04/11/72-hour-pizza-dough-from-baking-steel/
I'm sorry but I could not sit through that video. I wish there was a written recipe but it seems simple enough. You make a poolish with 00 flour, let it ferment overnight and then a few hours before you want pizza you complete the dough with more flour and salt and maybe some olive oil, let proof once and then make your pizza. I assume you heat the stone in a 500 degree oven for an hour (I always also turn the broiler on for 10 minutes before I put the pizza in) and then bake the pizza at 475-500 for 6-12 minutes.
I know, the video is way too long. But it's useful for demonstrating the techniques. If you want a sloppy written version of the video, here it is:
Pizza Recipe
Poolish
150 mililiters water
150 grams flour
2 ½ grams yeast
Bit of honey
Stir together. Let sit at room temperature one hour. Put in refrigerator for about 24 hours.
Pizza
350 milliliters water
20 grams salt
625 grams flour
Stir the poolish into the water. Add half of the flour and stir well. Add the salt and the rest of the flour and mix well. Turn it out onto the counter and work the dough, pressing and pulling until smooth. Let it rest 15 minutes.
Put olive oil on your hands, pick up the dough and pull it over and over, making a kind of ballon, unti it is smooth. Oil a bowl and put the dough ball into the bowl, cover and allow to sit at room temperature for 30 minutes.
Turn the dough onto a board, put a bit of olive oil on your hands and divide the dough into 5 balls.
Sprinkle a baking pan with semolina and place the balls into the pan. Pat a bit of oil on top of each ball and wrap the pan in plastic wrap. Allow to rest for 2 hours at room temperature.
Place a pizza steel into the oven and preheat the oven at 500 degrees for 1 hour.
Stretch a ball of dough into an 8 or 10 inch round. Cover with simple tomato sauce. Put in oven until crust is golden. Remove, dust with grated parmesan and chunks of mozzarella and put back into the oven until fully cooked.
Repeat with remaining dough balls.
Makes 5 small pizzas.
Can you freeze the extra dough at some point? I can't imagine being able to use all of this at one time. Or make a smaller version of this recipe?
Yes, the dough balls freeze beautifully. But this isn't actually all that much; 4 of us ate almost all of this.
The video has a link that shows how to properly freeze and thaw the dough.
I can’t even see a video. Can you post a link?
The link is in Rachel's text in the word "Here" where she says "You can see it here." above.
Thanks! I missed that.
7-15-2022 Hi, Ruth! I’m trying to get in touch with you.
Send your email or contact to me at Antonia.allegra@gmail.com
707-200-4147…Antonia (Toni) Allegra
Hope you’ll respond…
I was today years old when I learned the word POOLISH. Love it!
I tried this pizza technique. I ended up buying a cast iron pizza pan (instead of a steel or stone) because pizza is now the favorite meal of the family.
thanks for the pizza recipe - the result was delicious and fun to make
mirepoix... once I learned the value of a good mirepoix, there was no turning back. I don't make soup or sauce without starting with a mirepoix. such an easy process, but such deep flavors that come from it.
Great Article and great replies. Bookmarking.
List including ingredients:
1). The Pasta Maker, finally. I have always been successful at creating pasta like gnocchi by hand. However, I have never been successful at rolling out pasta dough when it needs to be thin. Problem solved.
2). Semolina Flour. The flavor. The bite. The ease of use for hand shaped and specialty pastas. Yes, Semolina has changed mine and my husband's life.....I know it's heresy, but I was "forced" to use Semolina for Pierogi, for lack of AP. Sorry, but it took that Pierogi to the next level.
3). 00 Flour. Easier to work with. Better texture and crunch with all things crust and bread. I tried it to dredge chik breasts for pan sautee. The crunch was as close to fried chicken as could be without all the fat. Who knew?
I can't wait to try this! I fell in love with a simple cast iron skillet using Pastene tomatoes as sauce. It allows for some fermentation time and I've made it in the same day or several days later. Big fun. And, brilliant.
Chunky mashed potatoes, best if made without peeling (but washed) thin-skinned potatoes. The result is very similar to a scone, whereas one mixes the dough enough to create a melange but not so much that it is smooth. The uneven air pockets and dough balls add integrity to the scones. As for potatoes, lots of butter but very little mashing makes for a chunky side dish that's quick and easy to make.
Understanding that you need one of two things to make gluten in a dough: kneading or time. And then experiencing the joy of making Bon Appetit's 'Shockingly Easy No-Knead Focaccia' for toast soldiers, panini, and Detroit-style pizza that will knock your socks off.
Is anyone else amused at how he describes this as a fast and easy method for pizza in a few hours and same day? Hardly same day, hardly simple. But his end product certainly looks superior. Also he doesn’t explain why the dough must remain right side up throughout the process. Something to do with air bubbles maybe?? Would love to know.
I think he is trying to maintain the gluten veil that forms with well handled dough. Have you ever microwaved something covered with plastic and it forms a high bubble because you didn't poke holes in it? Same thing with a carefully formed gluten veil. It has strength from the gluten that allows the gases to expand the dough but not blow through it, thus giving a beautifully bubbly crust. Sometimes bread bakers want to control and open up that veil by slashing their proofed loaves with a lame, knife or razor blade, allowing gases to expand while making beautifully shaped bread
Wow fascinating! Thank you very much
Where’s the pizza recipe?
It's in the video of the link she provided.
Didn’t see the link
Naan bread. I would find Naan bread on clearance at my local grocery often. I decided to try making pizzas with the Naan. They are incredible. You need to EVOO your bread on both sides and place on cookie sheet and put in 425° oven for about 8 minutes. Pull out and flip bread over. This creates a crunchy crust under the sauce. Add all of your favorite pizza ingredients, sauce (traditional, cheese or Alfredo), pepperoni, mushrooms, bell peppers, black olives, banana peppers, jalapeno peppers, rotisserie chicken, cheese, etc. Bake for 8 - 10 minutes and golden. This recipe sounds delicious as well. I pinned it into 'my recipes to try'.